Xamarin.UITest based on Calabash and have a similar operating principle. However, in this framework tests are being written by С# and NUnit (in difference with Calabash in which Gherkin+Ruby is used).This framework is cross platform, that`s why it allows to create crossplatform tests, both on iOS and Android. Windows Phone is not supported and Andrew personally think it is a disadvantage of this tool. But on the other hand this tool supports tesing of native apps on Java and Objective-C.
What are the advantages of Xamarin.UITest
Surely the most of you can oppose that there are native frameworks for Java and Objective-C that make a good job of it. But if you need to write UI Acceptance Testing simultaneously for both platforms, Xamarin.UITest will be very useful. Moreover there is native Xamarin Test Cloud support . Test Cloud is very useful but rather expensive.
More about how it works
Work mechanism on OS and Android is different. Nuget package is embedded in iOS app, it raises an http server inside your application. That`s how it works:
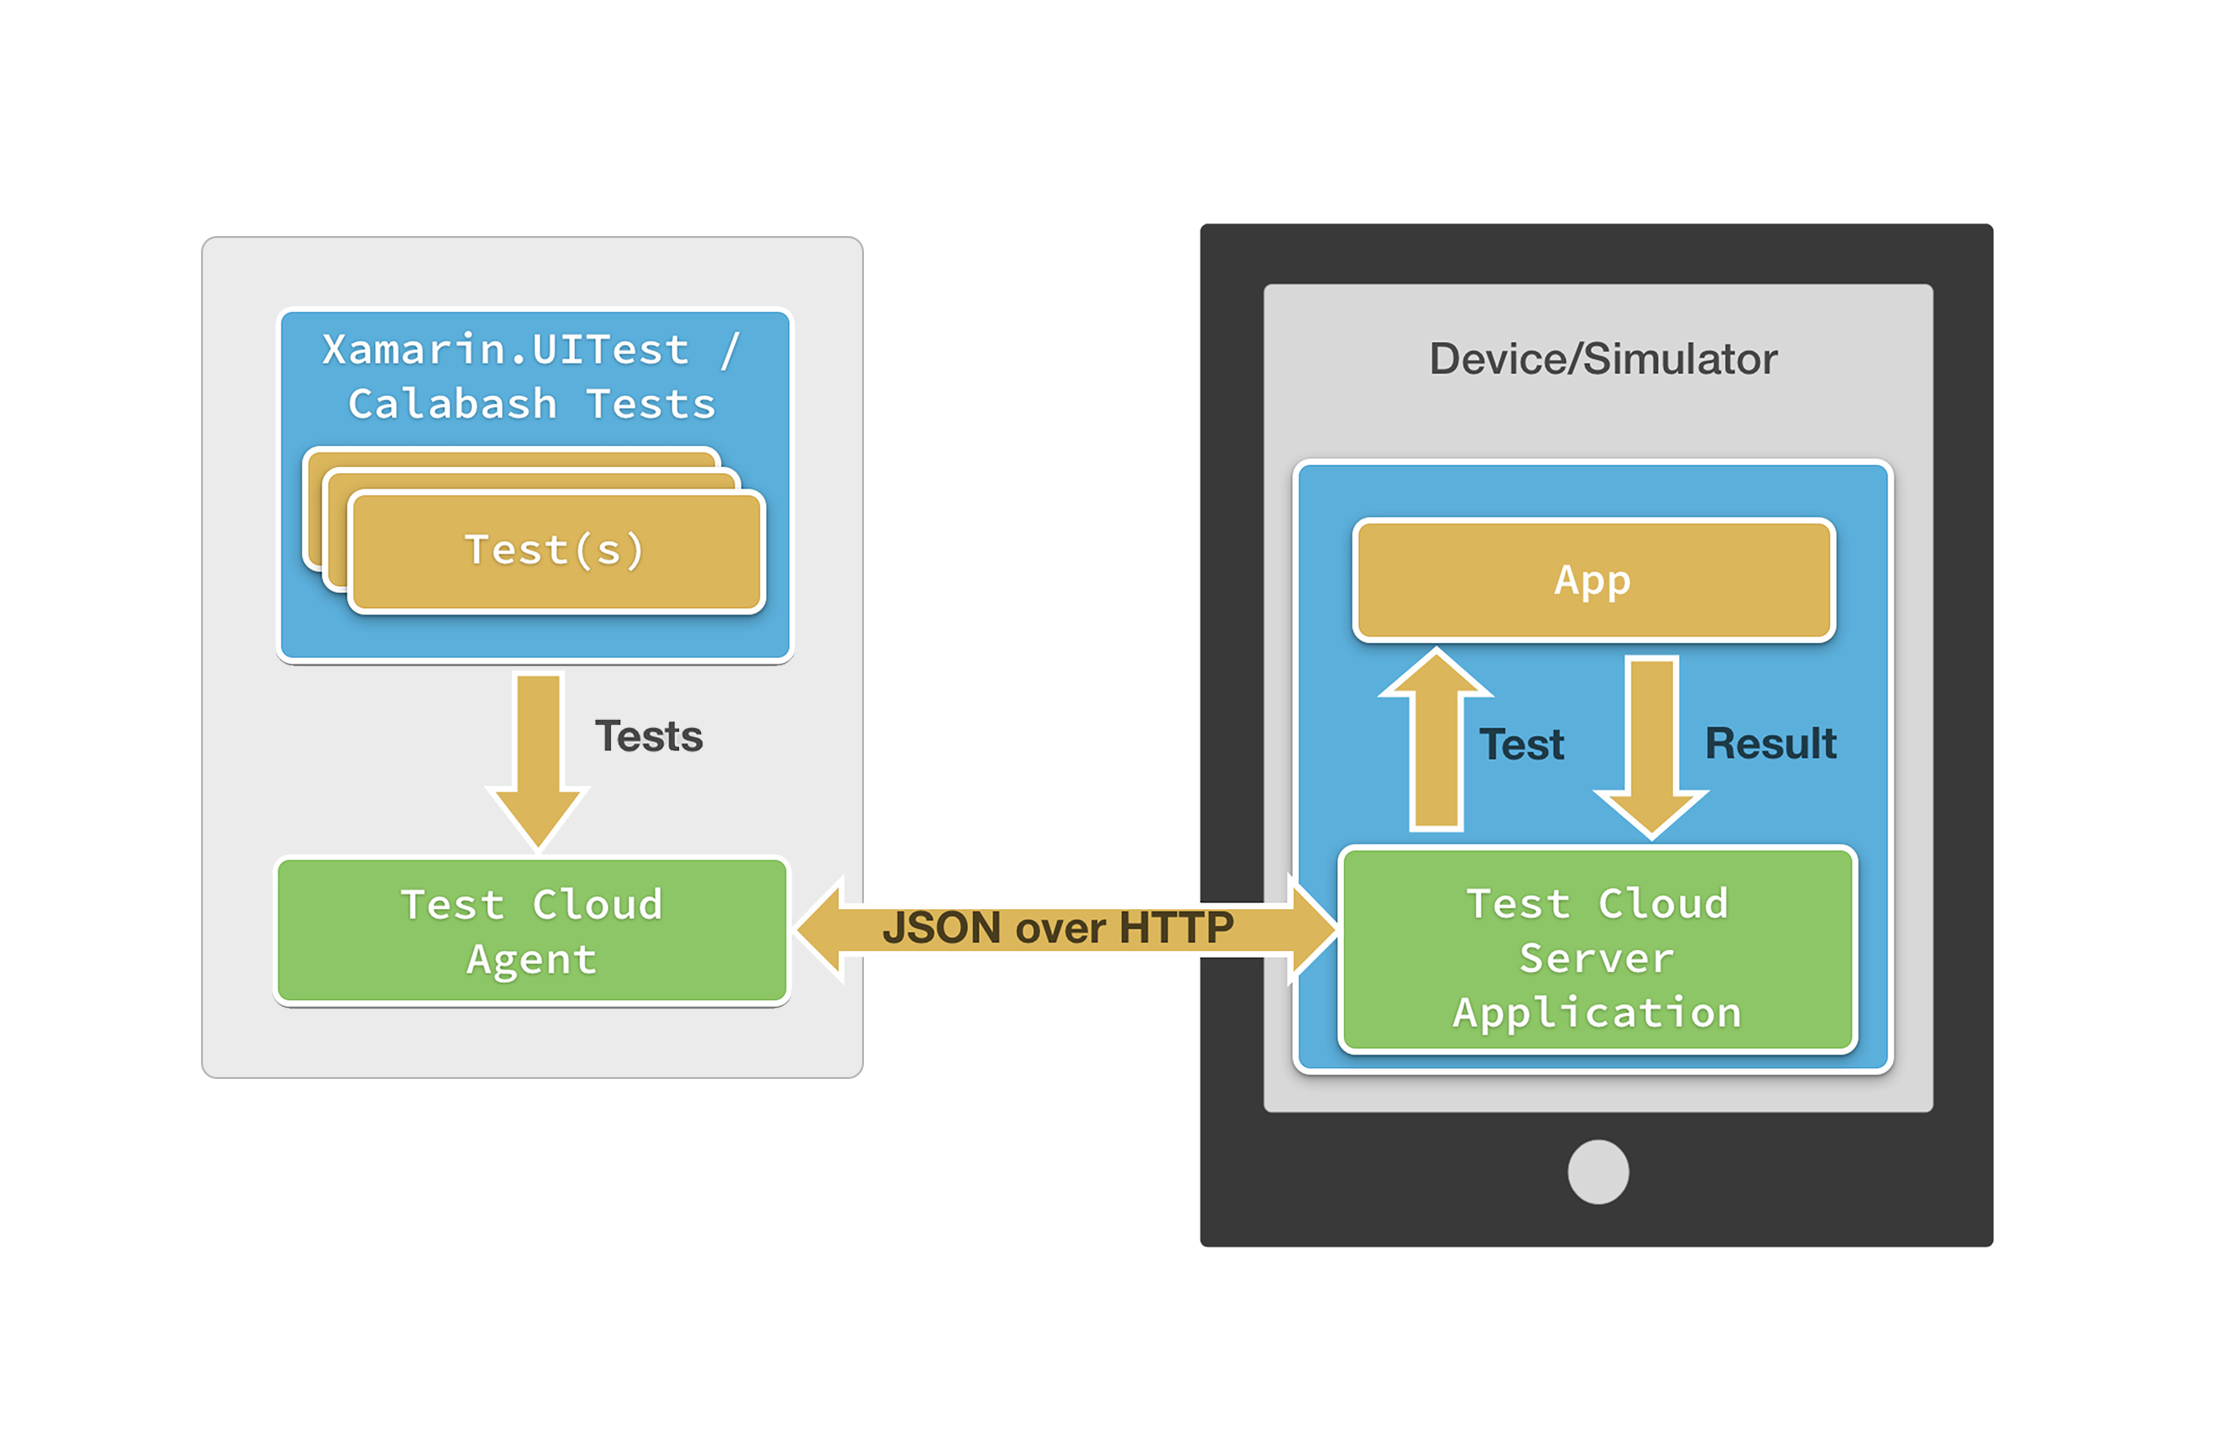
It is performing a little different on Android . During tests’ assemly and launch , two apps are being installed on the device: your app and Test Cloud server. Both of them are signed by the same key. That`s why Test Cloud server has rights on managing your app. It`s looks like this:

Xamarin.UITest embeds in solution rather easy, almost in a couple of clicks. You just need to create another one project for UI tests.
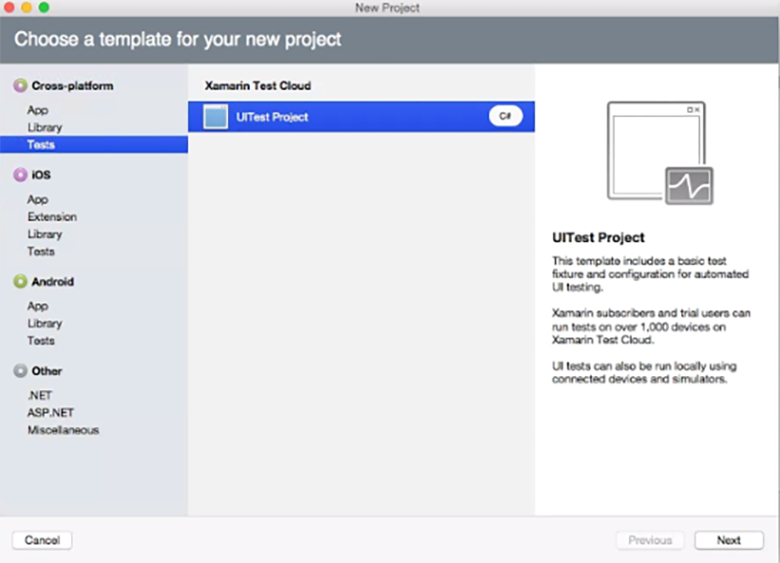
After this simple actions project with template initialization and installed packages is added. Then you need to add Nuget package Xamarin Test Cloud Agent NuGet to iOS project and to write in AppDelegate the following:
<p>CODE: https://gist.github.com/VladMogwai/15b90051835f6e4984cd7a2f2f45484c.js</p>
If you use Xamarin`s IDE the integration can be considered as completed. For Visual studio you’ll have to make all the actions manually. But it is rather simple. Besides the actions with iOS project you need to add PCL project and install Nunit and Xamarin.UITest packages into it.
If you use Xamarin`s IDE the integration can be considered as completed. For Visual studio you’ll have to make all the actions manually. But it is rather simple. Besides the actions with iOS project you need to add PCL project and install Nunit and Xamarin.UITest packages into it.
Now let`s talk about our tests’ configuration
We are interesting in two classes: Tests and Appinitializer. Let`s start from the second one:
<p>CODE: https://gist.github.com/VladMogwai/10a563c71fe8167a075db97c4f223dc3.js</p>
There is parameter set besides mentioned in TODO way to apk and ipa files. For example, the device ID where tests will be launched, api key for Xamarin Test Cloud and others. The class defines a platform for running and launches the tests on the selected platform. Now let`s consider the Tests class:
<p>CODE: https://gist.github.com/VladMogwai/a8c47798c9f4f6da1ead17a83369f7ab.js</p>
The method with SetUp attribute will run our tests and transfer them to StartApp platform.Unfortunately “native” variant will work only for Xamarin.Forms project. On MVVM-Cross you can make something like this:
<p>CODE: https://gist.github.com/VladMogwai/ddf44cbb1cf330b93036442d66702dd5.js</p>
Thus, you need to create TestiOS and TestDroid targets.
Well.. set it up, launched, it’s time to start writing tests!
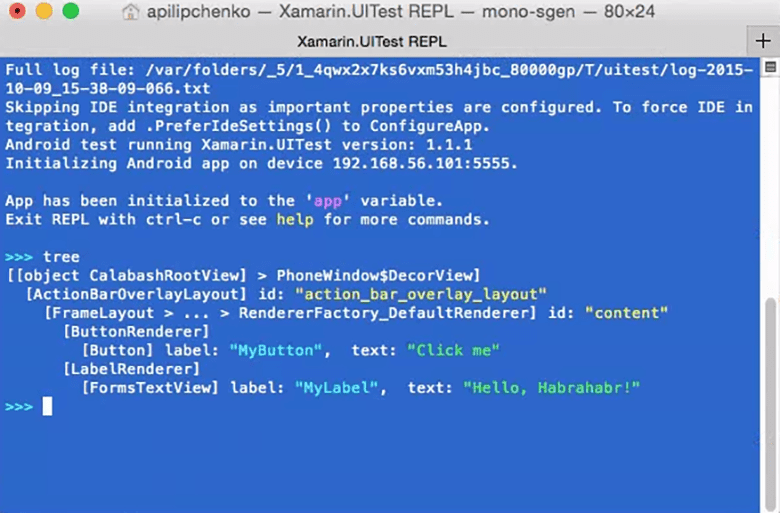
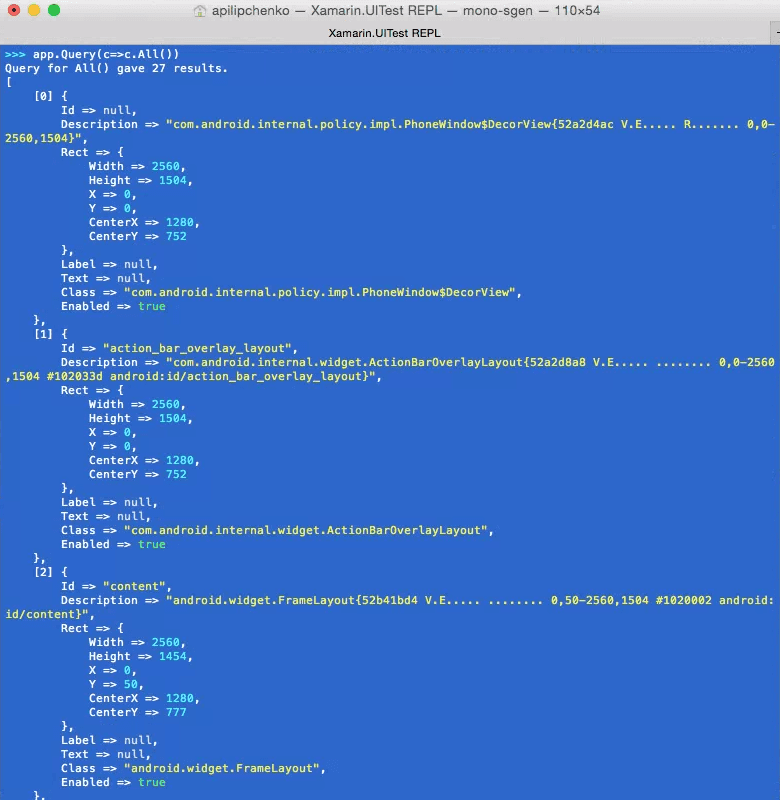
Tests are usually have standart Arrange-Act-Assert strucrure. You should test that contains Repl (read-eval-print-loop ) method. It runs the console where we can see the structure of visible part of our application. This is done as follows:
<p>CODE: https://gist.github.com/VladMogwai/e935e2b5d48641a96853b86db77a30b1.js</p>
This method calls REPL console. For clarity, Andrew executed tree command there, it retreives information for all visible elements:
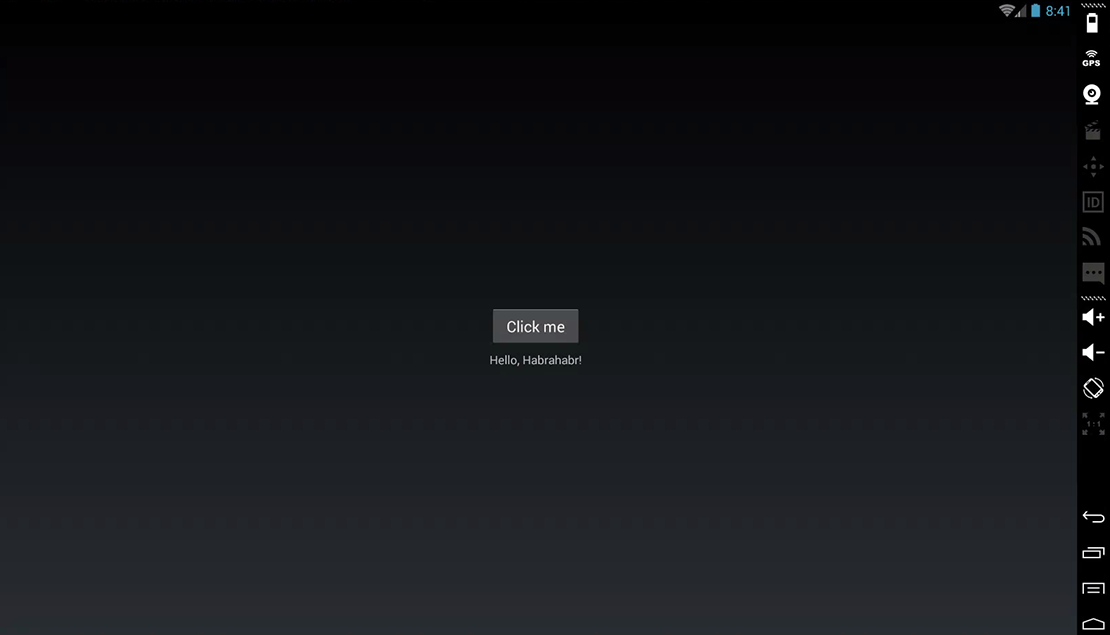
And the app looks like this:
To interact with control elements we need to use the IApp interface methods. In this article we will consider just three of them: Tap(), WaitForElement() and Query(). Though there are much more of them and here you can find the full list with their properties.
First we have to get the identifiers of AppQuery type elements. This is done as follows:
<p>CODE: https://gist.github.com/VladMogwai/e21434c1405fc8fe7bc1c6fad3acb84b.js</p>
Well, we have got AppQuery for all elements and now we can interact with them. Let`s validate the startup message, tap on the button and validate received message.
<p>CODE: https://gist.github.com/VladMogwai/ae749409fe6d19772ba17a7a2496e38d.js</p>
As you can see, IApp methods (the instance in this case is app) take as input AppQuery data type parameters and return an AppResult[] type result. But for all that Linq expressions only applicable to AppResult[], thus assertions and AppResult[] looks like this:
In this example, during the local launch tests can be started concurrently on both platforms, and all the results will pour in one console (in Andrew`s opinion it`s not very conveniently). In addition, in a couple of clicks you can integrate Xamarin service TestCloud and run tests in the cloud. A test launch is made from unit tests panel, what is quite convenient.
Except tests running agent you need to add api key in TestCloud (Andrew didn`t put it in this sample). You can learn how to get and to use it here.
Link to the sample that was used in this article is here.
Useful links:
https://docs.microsoft.com/en-us/appcenter/test-cloud/frameworks/uitest/
https://testcloud.xamarin.com/
https://docs.microsoft.com/en-us/dotnet/csharp/programming-guide/concepts/linq/
At this point we are finishing our brief excursion into Xamarin.UITest. I hope Andrew`s review was useful for you. Thank you for your attention and see you soon in our blog!


.webp)


